
3 of these 12 designs for nail art need nothing but polish and a bobby pin.
The rest climb one skill at a time, up to tortoiseshell and 3D gems.
So I ranked all 12 from easiest to hardest, each with its skill level, the tools it takes and the first step to make tonight.
Not sure which one fits you?
- Shaky hands and one free evening point to #1 or #3.
- If you can’t paint a straight line, #6 lets a magnet make the design.
- Booking a salon anyway? Bring a photo of #11 or #12.
How These Nail Art Designs Are Ranked
These nail art designs are ranked by skill, from polish-only looks to 3D sets that need a salon. Ties go to the design with fewer tools.
Nail art is any design that decorates the nail beyond one solid color. A clean simple nail art design beats a smudged hard one, so start where your hands are today.
12 Designs for Nail Art, From Easiest to Hardest
The easiest designs for nail art are skittle nails, glass nails and polka dots, because each needs only polish and household tools. From there, the list climbs through tape, magnets and brushes to 3D work.
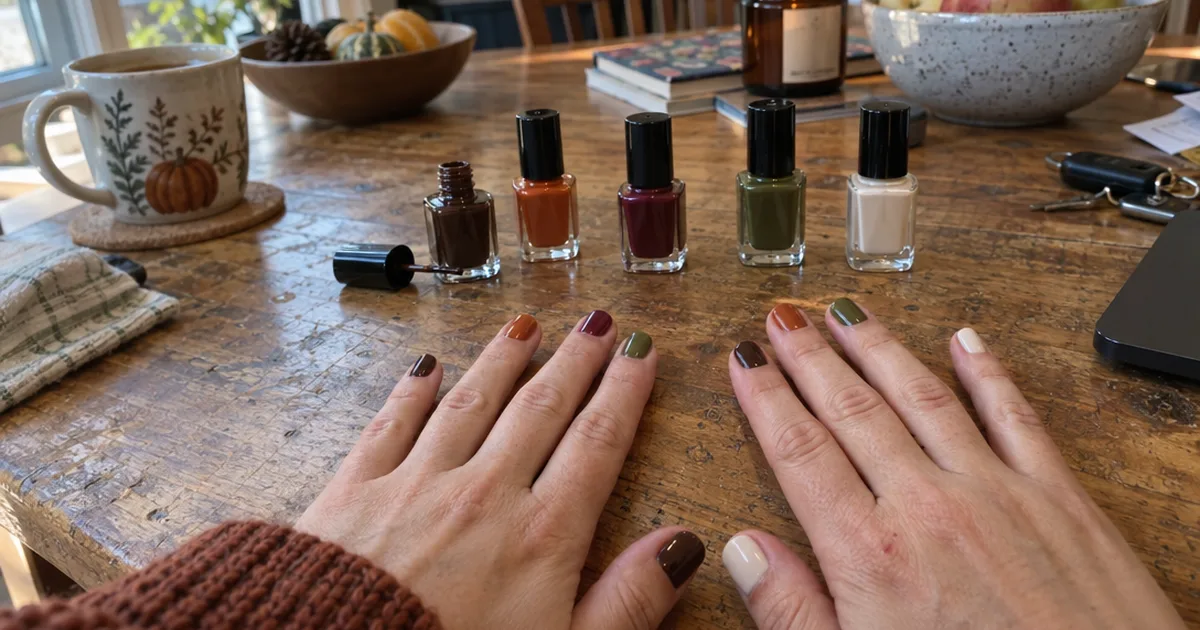
1. Skittle Nails
Skittle nails paint each finger a different shade, with no art at all.
At a glance
- Best for
- Anyone who can’t pick one color. Skip it if you want a pattern.
- Skill
- Beginner.
- Tools
- 4 or 5 polishes that share a mood, base coat, top coat.
- First step
- Line the bottles up from light to dark and paint in that order.
Pick shades from one family, like 5 brights, so the set looks planned. They make easy simple summer nails.
2. Glass Nails
Glass nails use a sheer, glossy polish so the nail looks like tinted glass.
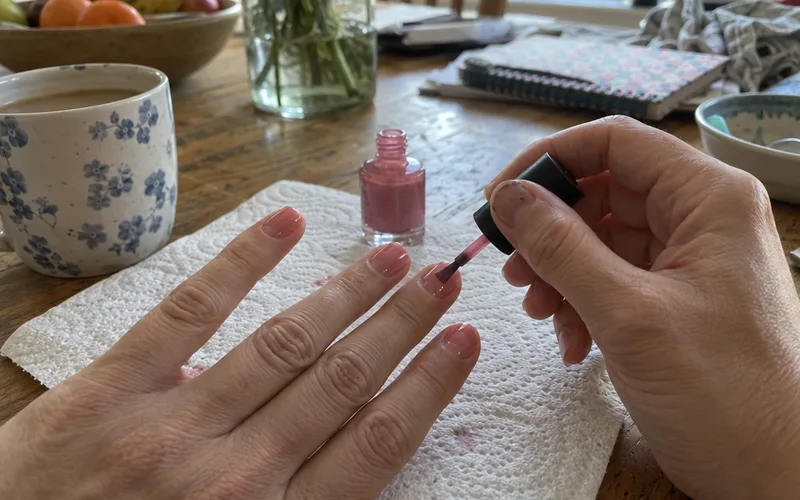
Nail artist Ashleigh Bamber says glass nails are a popular choice, an offshoot of the glass skin trend, in an interview with Who What Wear.
At a glance
- Best for
- A clean, polished look. Skip it if you want full coverage.
- Skill
- Beginner.
- Tools
- 1 sheer or jelly polish, a glossy top coat.
- First step
- Paint 1 thin coat and check the tint before adding a second.
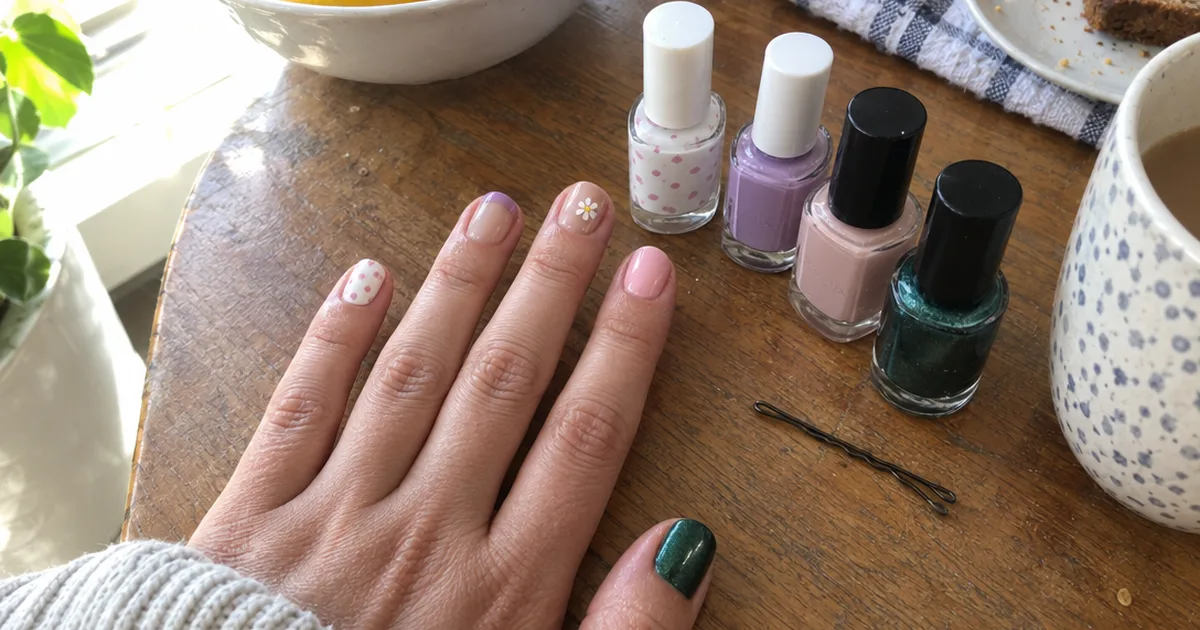
3. Polka Dots
Polka dots in a second color turn a plain manicure into nail art with one tool.
At a glance
- Best for
- Your first real pattern.
- Skill
- Beginner.
- Tools
- 2 polishes, a bobby pin or toothpick.
- First step
- Practice 10 dots on paper with the round end of a bobby pin.
Dip the pin in a drop of polish on foil, press straight down and re-dip every 2 or 3 dots so they match. A bobby pin is one of several nail art tools you already own.
4. Nail Art Stickers
Nail art stickers press a finished design onto the nail, so the sticker does the drawing for you.
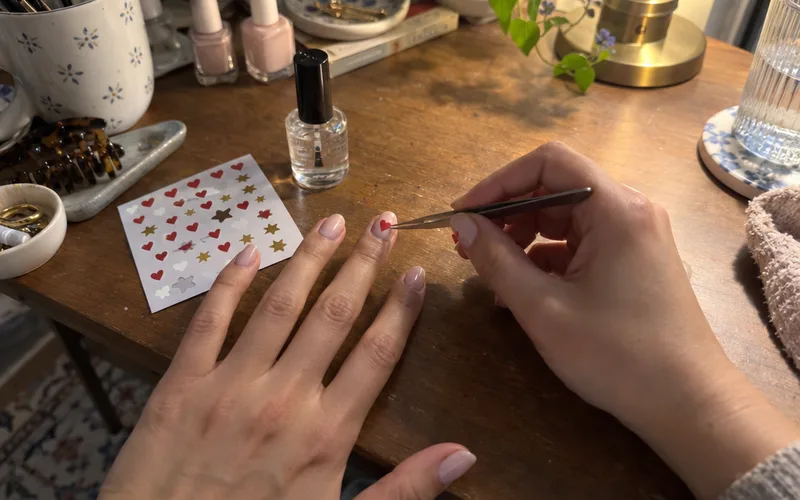
Press each sticker down from the center out, then seal it with top coat. Wet polish is the catch, because it makes stickers slide and wrinkle.
At a glance
- Best for
- Detailed looks like hearts, stars or lace with no painting.
- Skill
- Beginner.
- Tools
- A sticker sheet, tweezers, top coat.
- First step
- Paint your base color and let it dry fully.
5. Half-and-Half Color Block
Half-and-half nails split each nail into 2 colors along one crisp line.
At a glance
- Best for
- A bold graphic look without freehand skill.
- Skill
- Easy.
- Tools
- 2 polishes, clear tape.
- First step
- Paint the lighter color and let it dry completely.
Tape across the middle, paint the bare half and peel the tape while that coat is wet. A soft first coat lifts right off with the tape.
6. Velvet Cat-Eye Nails
Cat-eye polish holds metal flecks that a magnet pulls into a band of light, which gives the velvet look.
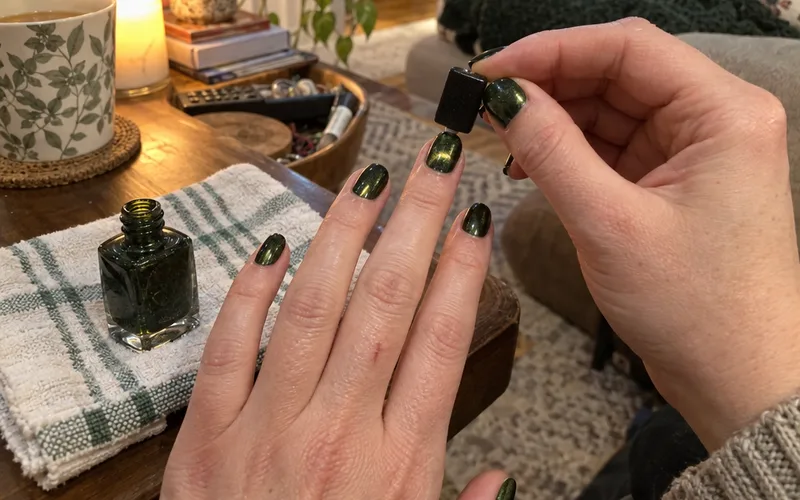
Work one nail at a time, because the flecks only move before the polish sets.
At a glance
- Best for
- Fans of shimmer with shaky hands.
- Skill
- Easy.
- Tools
- Magnetic cat-eye polish, its magnet, top coat.
- First step
- Hold the magnet over one wet nail for a few seconds.
7. Colored or Micro French Tips
A French manicure paints a contrasting stripe along the free edge of the nail, and the modern take uses color or a very thin line.
At a glance
- Best for
- Office-friendly nails with a twist.
- Skill
- Medium.
- Tools
- Sheer nude polish, 1 tip color, a thin liner brush.
- First step
- Paint 2 coats of the nude and let them dry.
Bamber told the same magazine that clients who prefer natural nails have been experimenting with colorful French tips. There are plenty more French nail ideas to copy.
8. Mini Daisies and Florals
Mini daisies are 5 small white dots in a ring with a yellow dot in the center.
At a glance
- Best for
- Cute, springy sets.
- Skill
- Medium.
- Tools
- A dotting tool or bobby pin, white and yellow polish.
- First step
- Paint 1 daisy on your ring finger only.
Put the flower near a corner and keep the other nails plain, the trick behind most classy spring nail designs.
9. Aura and Ombré Nails
Aura and ombré nails blend 2 colors into a soft gradient, using a makeup sponge instead of a brush.
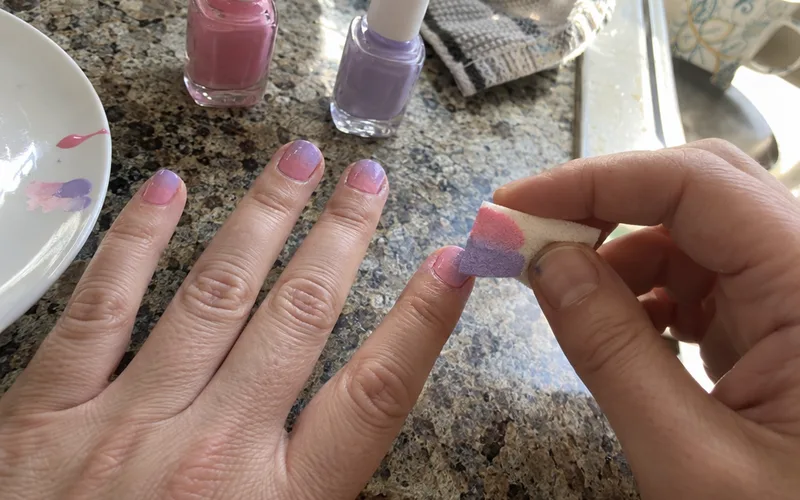
For an ombré fade, paint both colors in stripes on the sponge and dab it on the nail. For aura nails, tap the second color only in the center so it glows outward, a look that suits soft pastel nails.
At a glance
- Best for
- Soft color without lines to mess up.
- Skill
- Medium.
- Tools
- 2 polishes, a makeup sponge, top coat.
- First step
- Paint the lighter color on every nail.
10. Negative Space Lines and Swirls
Negative space nails leave part of the bare nail showing, with thin lines or swirls on top.
At a glance
- Best for
- Minimal, modern sets.
- Skill
- Medium.
- Tools
- Clear base, 1 or 2 colors, a long striping brush.
- First step
- Practice 5 curved lines on paper with your elbow on the table.
Wipe most of the polish off the brush, then pull each line in one slow stroke. A single gold line on a bare nail is one of the classy nail art designs that suits any outfit.
11. Tortoiseshell
Tortoiseshell nails copy the mottled amber and brown of real tortoiseshell.
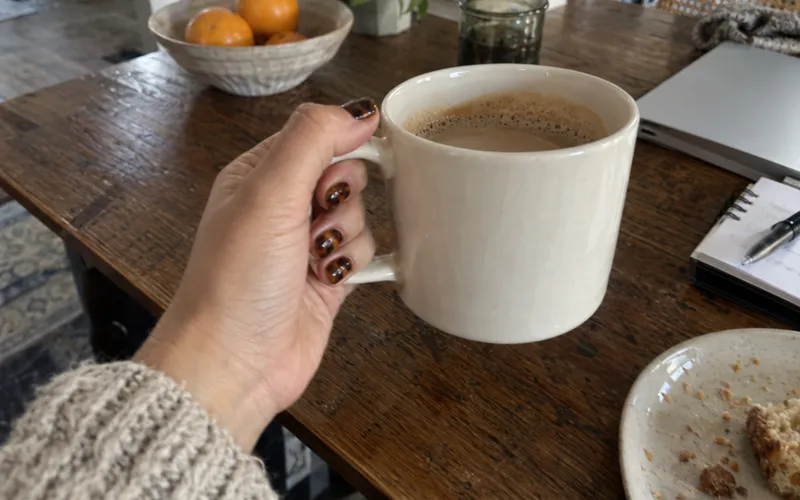
Dab uneven brown spots onto the wet amber coat, then tiny black dots inside them. It also appears in these fall nail designs.
At a glance
- Best for
- A pattern that goes with fall clothes.
- Skill
- Hard.
- Tools
- Sheer amber polish, dark brown, black, a fine brush.
- First step
- Paint 1 coat of the sheer amber.
12. 3D Gems and Chrome
3D nail art builds raised shapes, gems or pearls on top of the nail, often over a chrome finish.
At a glance
- Best for
- A wedding, birthday or night out.
- Skill
- Hard.
- Tools
- Gel polish, an LED lamp, nail glue or gel, flat-back gems.
- First step
- Practice placing 1 gem near the cuticle of an accent nail.
These are the 3D designs with gems that Bamber says her bolder clients request, and they lead many lists of trending nail art designs.
What Tools Do You Need for Nail Art?
The tools you need for nail art are base and top coats, 2 or 3 polishes, a thin liner brush and clear tape. Without special nail art tools, a bobby pin makes dots and a toothpick draws fine lines.
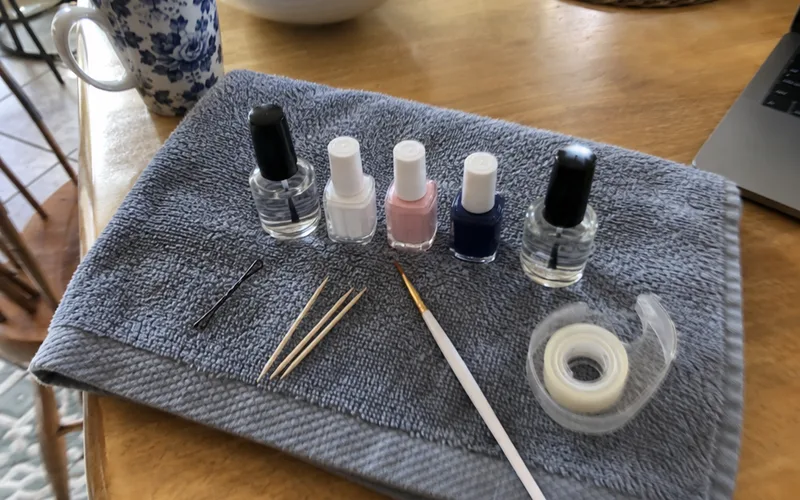
That small kit covers #1 through #11, and a brush dipped in remover cleans up mistakes so home nail art looks neat. For the files and pushers that prep the nail, see these manicure tools and their uses.
Gel or Regular Polish for Nail Art?
Gel polish is better for detailed and 3D nail art, because it stays wet until you cure it under an LED or UV lamp. Regular polish is better for learning, since it air-dries and wipes off in seconds.
Gel also means buying a lamp: Zoya lists LED nail lights for its Gelie-Cure gel system, for example. If you’re curious, start with gel nails at home, and learn how to remove gel nails before your first set.
Nail Art Designs for Short Nails
Short nails suit small designs that leave most of the nail showing, like micro French tips, single dots, mini daisies and thin negative space lines. A big pattern crowds a short nail and makes it look smaller.
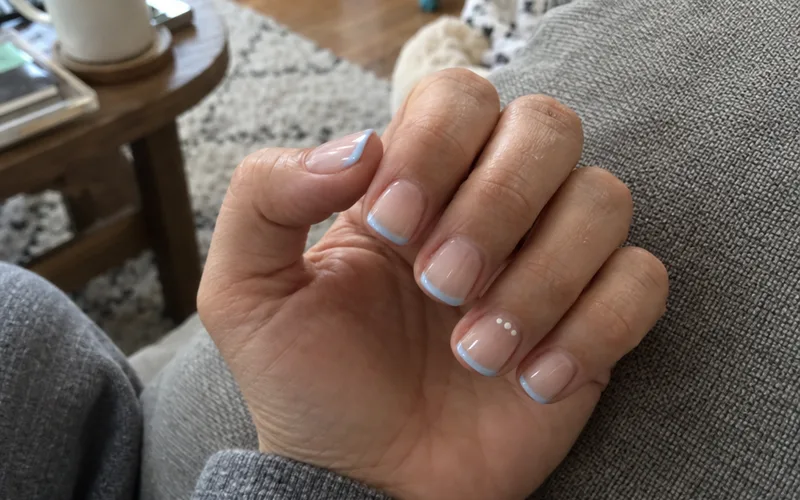
So shrink the design: try #3, #7 or #10 on one or two accent nails. Browse more designs for short nails or these classy short nail designs.
Press-On Nails for Hard Designs
Press-on nails are the shortcut for hard nail art designs like tortoiseshell and 3D gems, because the design arrives finished. Lost Angels says its press-ons last 2+ weeks and come in a medium almond shape that mimics a natural nail.
The same brand page quotes Nylon saying the press-ons made a silver-studded full set possible in under ten minutes. Compare more press-on nails that last before you buy a set.
How to Make Nail Art Last Longer
Nail art lasts longer when you start on a clean, oil-free nail, paint thin coats and seal every edge with a top coat.
Here’s the routine:
- Wipe each nail with polish remover to clear oil and lotion.
- Apply a base coat and let it dry.
- Paint thin coats, letting each one dry before the next.
- Brush top coat across the tip of each nail to seal the edge.
Add fresh top coat every few days and wear gloves for dishes. Healthy nails hold art best, so keep up the basics of nail care.
Frequently Asked Questions
What are the different types of nail art called?
The main types of nail art are named for how they’re made: French tips, ombré or aura gradients, polka dots, negative space, florals, marble or tortoiseshell, cat-eye, chrome, stickers or decals, and 3D art with gems. Use those names when you show a nail tech a photo.
What are the most popular nail art designs right now?
Colorful French tips, glass nails and 3D designs with gems are popular right now, according to nail artist Ashleigh Bamber in Who What Wear. Start with colorful French tips, the easiest of the three to paint at home.
Are nail art stickers good for beginners?
Yes, nail art stickers are one of the best starts for beginners, because the sticker does the drawing and you only place it. Put them on fully dry polish and seal the edges with a top coat so they don’t lift.
What are classy nail art designs?
Classy nail art designs keep to one soft color and one small detail, such as a micro French tip, milky glass nails or a thin gold line on a nude base. Keep the rest of the set plain so the detail reads as a choice.
Final Thoughts
Most beginners should start with #1 or #3, since both need only polish and a bobby pin.
Pick one design from this list and paint it on a single accent nail this weekend.